

How to create a new donor welcome series
When a donor makes their first donation, they are telling you “I am digging what you’re doing and I’d like to be part of it.” Now, it’s your turn to reply and begin a real conversation that includes the donor in your mission.
You may be wondering: does using email automation make things less personal?
And the answer is… Nope! Not at all. Email automation is crucial to personalizing your donor experience.
In this post, we’ll dive into how to create a solid first impression with your donors -- using a donor welcome series to set the foundation for lasting relationships and donor retention.
Why do you need a donor welcome email series?
If you want to retain your donors, automatic email marketing is the ticket. A donor welcome series is an automatic sequence of carefully crafted emails sent over a short period of time to invite your donors further into your world.
👉🏼THE GOAL: show gratitude to your donors
Your series is a space for you to show your genuine gratitude and illustrate the tangible impact of each individual’s generosity.
By delivering relevant and compelling content over a series of emails, you’ll create a sense of deep connection and trust. Giving donors a way to stay engaged also encourages them to potentially become long-term supporters of the organization. It’s a win-win all around.
What do you do when a new donation comes in?
Ideally, your new donor process would look something like this:
Write a handwritten thank-you note.
Call and thank the donor for their generous gift.
Ask them if they’re interested in volunteering, joining your virtual event, managing a database, or becoming your board treasurer (because you really do need one and yes, you’re desperate).
But as a small shop, that’s a lot of work for a single donor, and it’s much said than done.
Here’s the usual scenario:
A donor makes a donation — A GIFT. This is real money in your organization’s bank account, but you’re so busy in the flow of all the other things on your to-do list that it takes days, a week, or maybe even a month to respond. Does this sound familiar?
I get it. You’re constantly stuck in catch-up mode — because that’s the reality of being a small shop ED. But what if a few hours of up-front work could take the workload of donor welcome communications completely off your plate?
It’s possible. Let’s walk through how to create a new donor welcome series.

What should your nonprofit welcome series include?
Having a welcome series isn’t the right place to expound about your mission and values. Yes, you’re introducing yourself to new donors, but you need to be doing it with the donors themselves at the center. Make your donor the hero. Help her feel valued and appreciated.
Share a story, not a copy-paste of your mission statement.
Please, from the bottom of my (marketer-turned-executive-director) heart, do not include a single sentence about your mission in these emails. Engage your audience by making it about them. Show the donor the role they’re playing in the cause, and make it feel significant.
Here’s what a sample welcome series looks like:
Email 1: Acknowledge the gift + welcome the donor to your nonprofit family
Donors give to your nonprofit because they already have some belief in your mission. They stay with you because you prove yourself worthy of long-term trust and financial commitment. Transparency and dependability are key to developing that trust. So send that letter of acknowledgement as soon as you can; don’t make them wonder if you’ve even noticed their donation.
Most experts agree that a letter of acknowledgement or thanks should be ready to send to the donor within 72 hours of receiving the gift. Some even say within 48 hours.
If done within the first two days, your acknowledgement creates a strong first impression, building confidence in giving and nurturing donor loyalty. (Hello, trifecta!)
Email 2: Spark a two-way conversation
Ask an open-ended question about how the donor came to know you or what motivated them to give. More than anything, you’re looking for a reply here, something that opens a line of communication focused on the donor and their gift. It’s a chance to get to know them better.
Some questions you could try:
What more can we tell you about our organization?
What connects you to our cause?
How did you hear about us?
What type of content do you like getting in your inbox? Blogs? Videos? Tell us!
Test out different questions to see which one ignites a reaction. You’re not going to get a response every time, but it’s worth a try. At the very least, you’re communicating to the donor that you’ve noticed them and care about hear their perspective.
Email 3: Talk up your nonprofit’s work
Your third email is where you actually introduce your organization. It’s the “Show and Tell” of what you do. But keep in mind, everything should still be focused on the donor. This email might include:
An infographic illustrating the work you do
An article about gender equality or another topic adjacent to your work
A recent article that features or mentions your organization and work
💡THE BIG IDEA: Share with the intention of serving your audience content that deepens their understanding of your organization and mission.
Sharing is serving — people want to be educated, entertained, and inspired. Use mission-aligned articles, podcasts, and relevant news stories to connect your nonprofit to relevant topics.
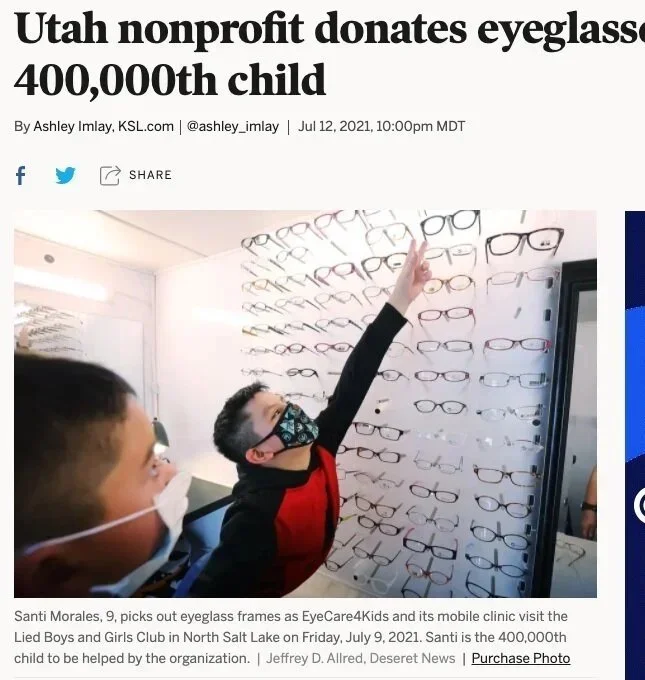
Source: Deseret
Email 4: Tell an impact story
Tell a story about someone you affected with your work. How did the donor’s gift make a difference in that case? Provide some context about the situation. What was life like before the donor got involved vs. afterward? Make the story personal. Include photos and quotes if possible to provide more of a personal touch.
Email 5: Offer a next step
This is where you give your donor an opportunity to continue their relationship with you. What’s an action they can take to become even more connected to your work? They could:
Sign up for your newsletter
Volunteer to work an event
Read up about a program you offer
Follow your organization’s accounts on social media
Give your donors a soft ask to help them become more connected to your nonprofit organization, one that’s easy for them to fulfill while still making a difference in the relationship.
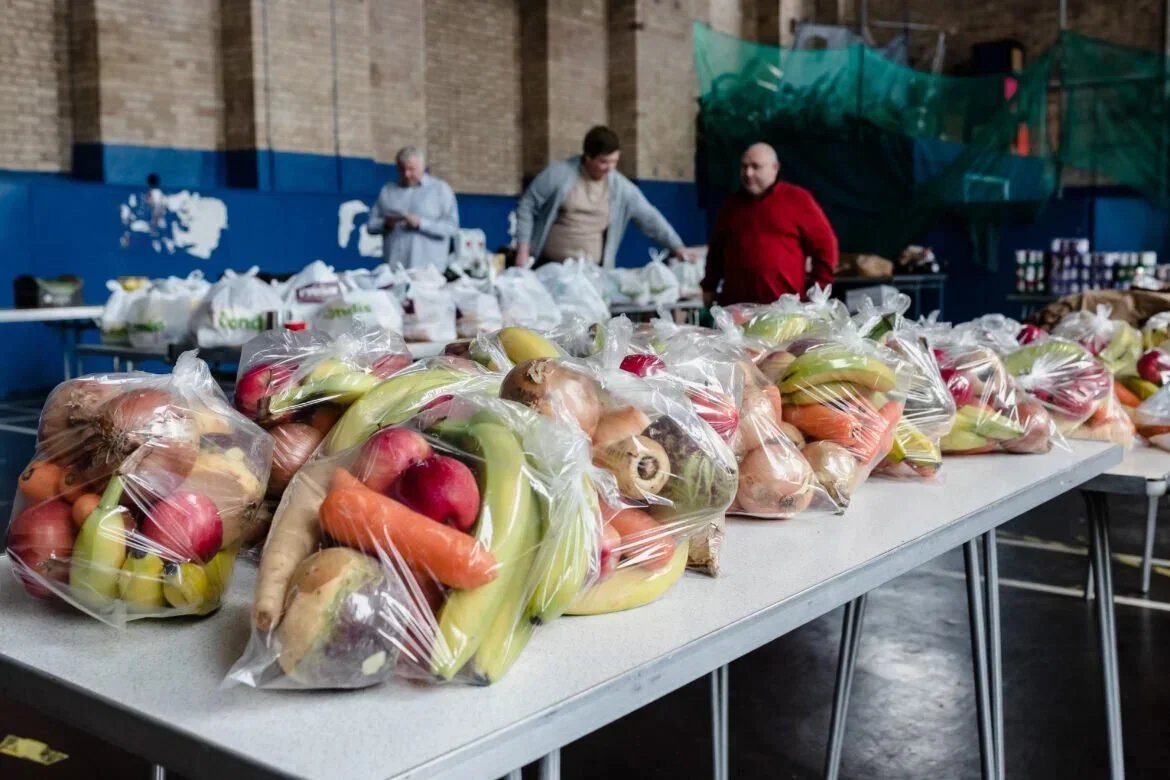
Source: NYC Food Policy
How do you set up a donor welcome series?
1. Make an outline.
For starters, you’ll need to make a plan for each email. Follow the outline above and create a basic structure for each message. (Think: What’s your greeting, intro, what’s going in the body of your message... you get the idea.)
Then list out any of the digital assets you’ll need. For example…
Do you need to create a survey?
Do you need any graphics?
Do you want to include photos or videos?
I know this sounds like an extra step, but trust me. Having a clear outline—and knowing what content you need to gather or create—will help make this all feel easier when it comes time to write.
Okay. Now that you have an idea of what you want your messages to look like and what you want to say in each email, it’s time to head to the next step: writing!
2. Draft the emails.
Writing sounds scary—I know—but your first draft is really just dumping your thoughts down, without a filter. Focus on getting your ideas out. Don’t worry about how it sounds; just dump it all down. The refining and editing comes later.
Which brings us to the next step...
3. Edit and get feedback from others.
I mean it when I say this: do your revisions on a different day than you did the writing. Or at the very least, take a break of a few hours. You need to look at those emails with FRESH EYES. This makes it much easier to catch typos, and I recommend Grammarly or the HemmingWay app to assist with editing and spellchecking.
Even better: Call in some reinforcements. Can you get a colleague or board member to take a peek?
Whoever you get to be your second pair of eyes, have them check:
Does everything make sense?
Does reading the email make them excited about your nonprofit?
Do they want to learn more?
What would they change?
Bottom line: Get some feedback so you can share with confidence.
4. Upload into your email provider.
If you haven’t invested in an email provider yet—NOW is the time. Whether you use Constant Contact, MailChimp, ConvertKit, it doesn’t matter. As long as you have a system that you can use to automate and send emails to your donors (and ideally connect with your CRM... like DonorPerfect or Network for Good).
5. Send yourself a test copy.
Send each email to yourself as a test. You want to make sure the formatting looks clean and everything turned out the way you planned it. As an example, here’s a video on how to send a test email in MailChimp.
Once the test emails land in your inbox, check your gut reaction to the messages. When you open each email on your phone, are you overwhelmed or annoyed by how much text there is? Do you find yourself skimming? Are you entirely BORED???
If you’re bored, there’s a good chance your donors will delete the email by reflex. Spice it up with stories and GENUINE GRATITUDE. Come back to the draft in a few days with fresh eyes if you need to.
6. Set up email automation.
Automation will save you so much time. What’s the point in using tech if you’re not taking advantage of what the systems offer?
At bare minimum, set up the gift acknowledgement automation. From there, set up the rest of the emails to go out about once per week. Select a cadence that makes sense for you and your audience (and feel free to tweak six months from now, after you’ve seen how it works).
Engagement is the ticket to retention
Engagement is the “love language of nonprofits.” It’s your chance to show your donors how much you love and appreciate them. On the flip side, engagement is also your donors’ chance to REALLY get to know you - and fall in love with your amazing work even more!
When you create a memorable, engaging experience—from the VERY FIRST GIFT—you’ll form deeper relationships and improve donor retention.